CLEANING THE OPTICAL WINDOWS
CCD cameras are notoriously sensitive to dust and condensation, so you will often find evidence of ‘dust do-nuts’ etc. in your images. These will be much easier to see if you have a lot of sky background from light pollution and image at high F ratios, but may not be noticed at all when imaging with wide aperture lenses from a dark site. Large dust shadows will usually be due to dust on the outer window of the camera and are pretty easy to eliminate with a gentle wipe of the window, but smaller and darker shadows are caused by dust on the CCD faceplate and are more difficult to deal with. The first line of defense is to apply ‘flat fields’ to your images, as these will also fix any vignetting in the optics and do not involve any dismantling of the camera, but in bad cases you may have no alternative to opening the barrel and cleaning off the dust. If you are certain that you must clean the CCD, then please follow the instructions below. The pictures show an SXV-H9 being dismantled, but all SX cameras have a similar construction.
WARNING! Cleaning the CCD is not very difficult, if you have the right materials and take reasonable care, but you do run a risk of scratching the glass or making the situation even worse. If you are not sure of your ability to do the job, either use flat fields to remove the shadows or ask Starlight Xpress to do the cleaning job for you.
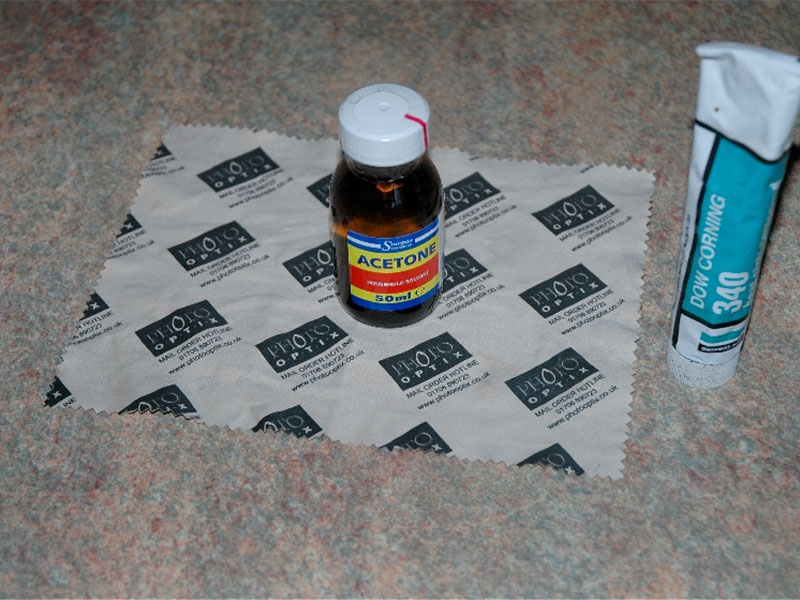
The materials that you will need
The microfibre cloth is available from photographic stores and the heat sink grease can be bought in small tubes from computer stores etc.
You will also find a powerful lens and a bright light to be very useful.
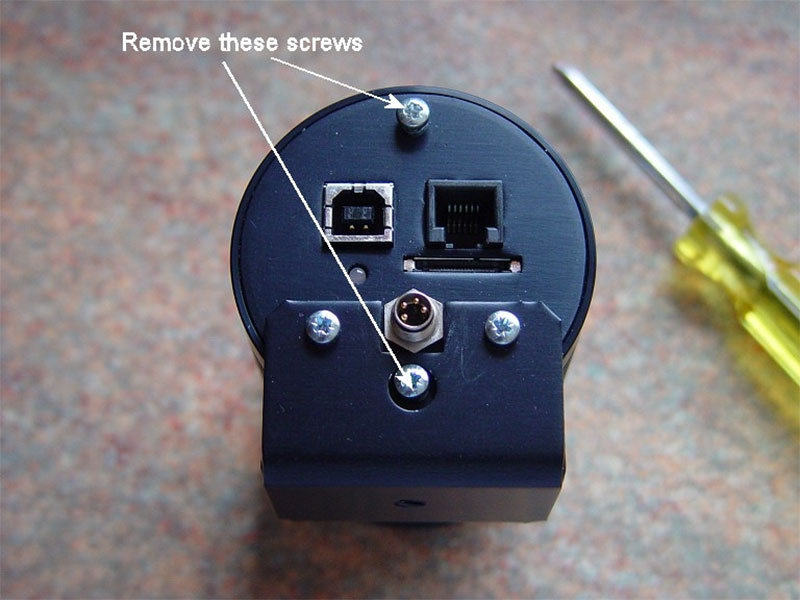
Here is a picture which shows the rear plate fixings to be removed. Older ‘parallel port’ cameras must have the two hexagonal plug locks unscrewed as well:
Lift off the back plate (wiggle it off the USB plug) and expose the power lead:
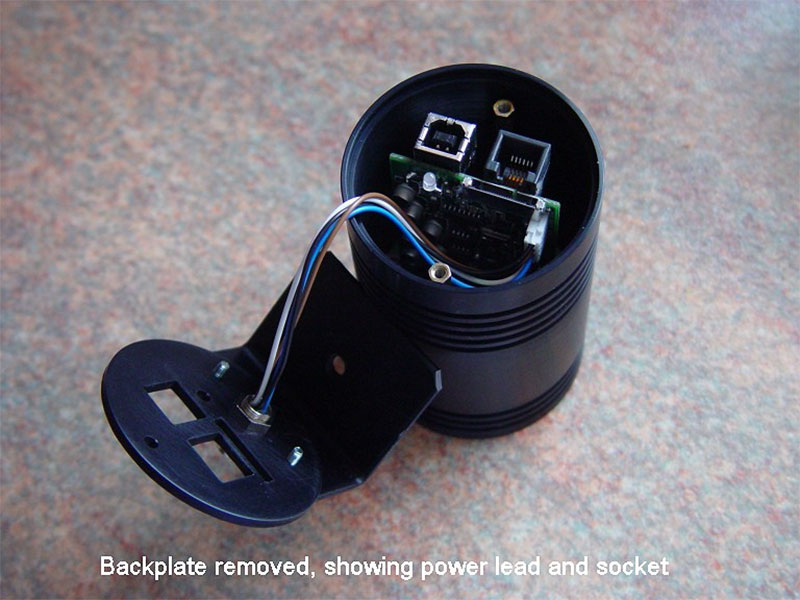
Unplug the power lead from the main board and lift off the main barrel. The long standoffs and screws hold the CCD assembly onto the front barrel:
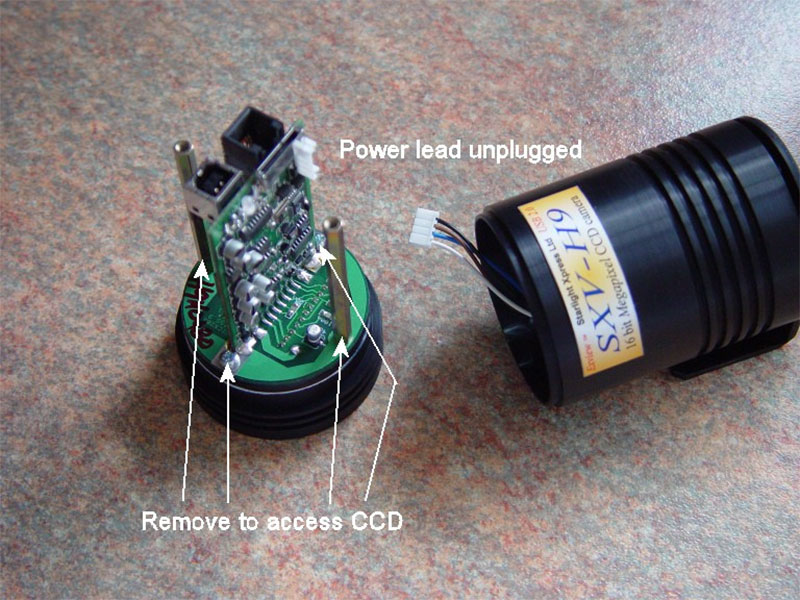
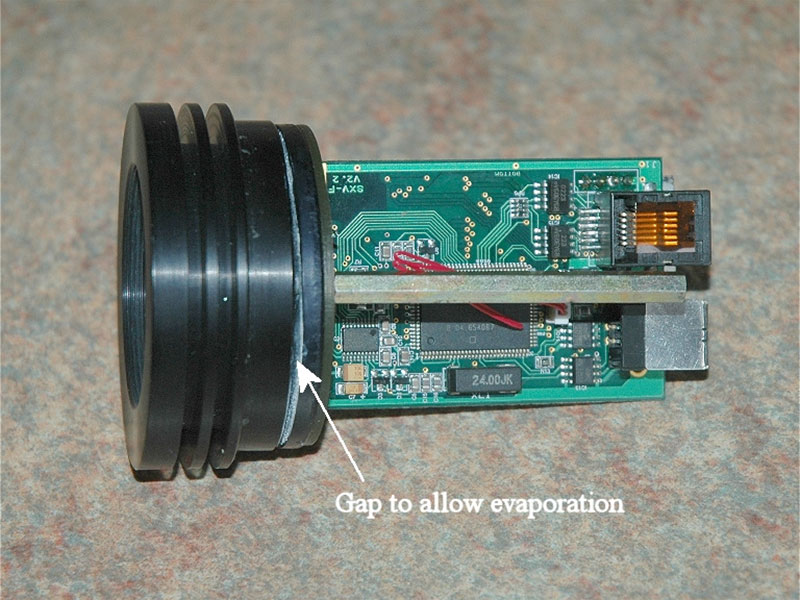
If you only have moisture condensation and no dust to remove, slacken the screws and standoffs as shown, and put the camera in a warm, dry place for a few hours. The moisture will evaporate through the gap and no dust will get onto the CCD:
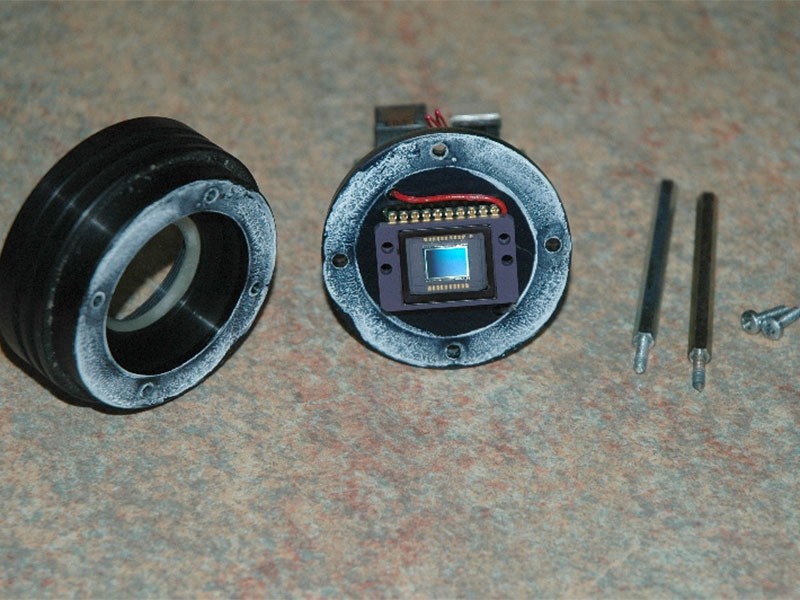
If you have to clean the CCD window, completely remove the screws, as shown and expose the CCD:
Clean the CCD glass by dropping a few drips of acetone onto it and then gently wiping the microfibre cloth from one end to the other in a single stroke.
This pushes the dust off the glass and leaves it on the ceramic chip body – don’t sweep backwards at any time. Examine the window under a bright light, using a good quality lens to search for dust specks (a 50mm SLR lens works very well). If you can see any spots, repeat the acetone treatment until you are sure that the glass is clean. The inside surface of the camera window may also be cleaned at this time,
but do not use any solvent on it as the epoxy seal will streak onto the glass. An ‘air cannon’ will often work well on this window, rather than wiping it clean.
Carefully reassemble the camera, renewing the white thermal grease seal, if necessary. It is wise to leave it slightly open in a warm place for an hour to dry out the chamber before sealing it and testing. DON’T test it until it is sealed up, or you will cover the CCD in dew as it cools down!!
It may be tested for remaining dust spots by putting a pinhole lens over the barrel end and imaging the sky.