CHANGING THE CCD (M5/M7 & H9)
Some SX camera users have asked if it is possible for them to change the type of CCD fitted into their cameras. This is usually to swap between a monochrome and a colour chip, or to upgrade to a newer CCD version. As with cleaning the CCD, this is quite easy if you take care, but don’t attempt it if you are unfamiliar with miniature and static-sensitive electronics. Chip swapping is possible in the M5/5C, M7/7C and H9/9C cameras, but the larger cameras are not designed for user chip changes and should be returned to Starlight for upgrades.
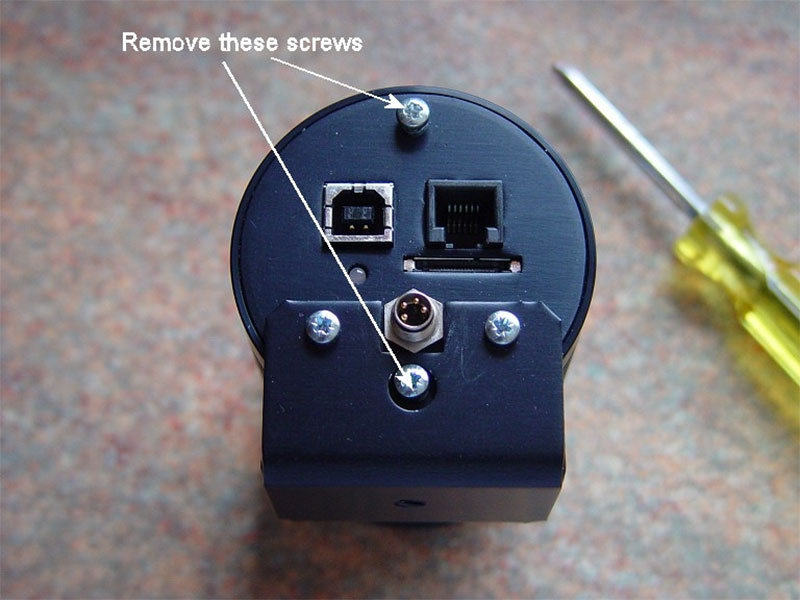
Here is a picture which shows the rear plate fixings to be removed. Older ‘parallel port’ cameras must have the two hexagonal plug locks unscrewed as well:
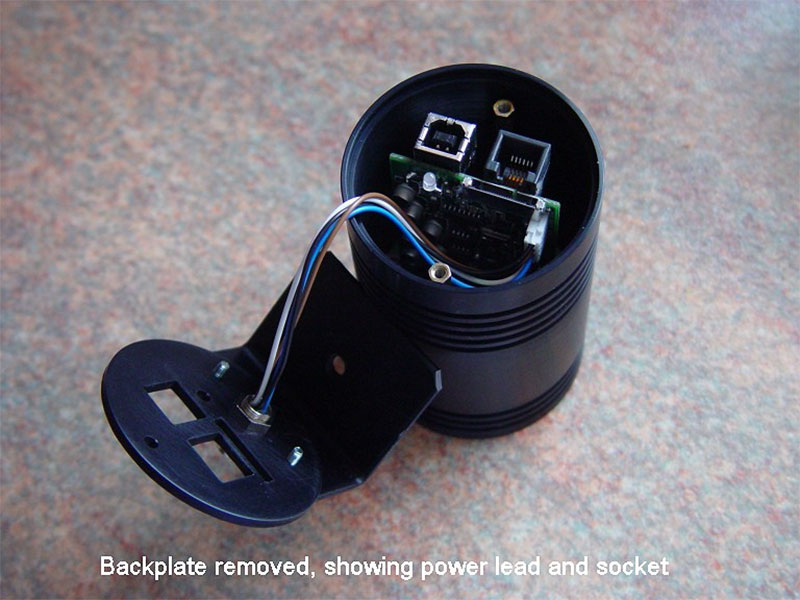
Lift off the back plate (wiggle it off the USB plug) and expose the power lead:
Unplug the power lead from the main board and lift off the main barrel. The long standoffs and screws hold the CCD assembly onto the front barrel:
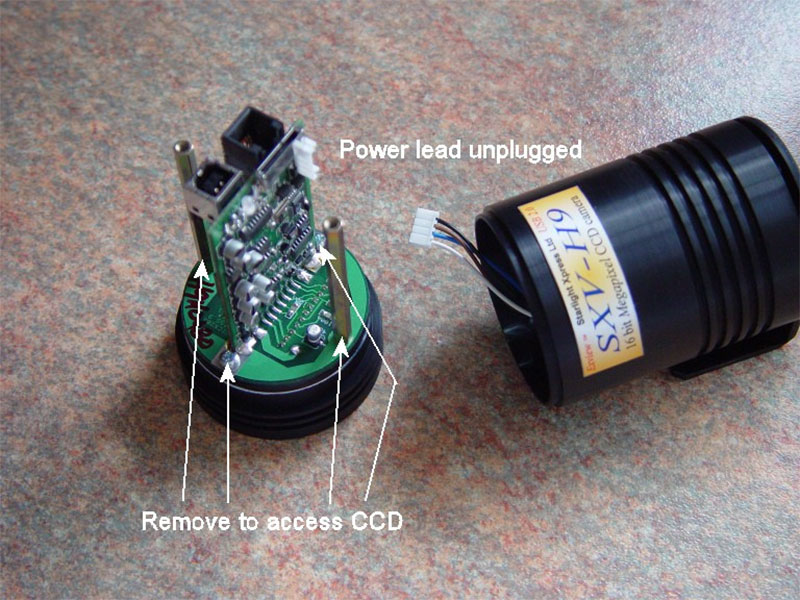
Now completely remove the screws, as shown and expose the CCD:
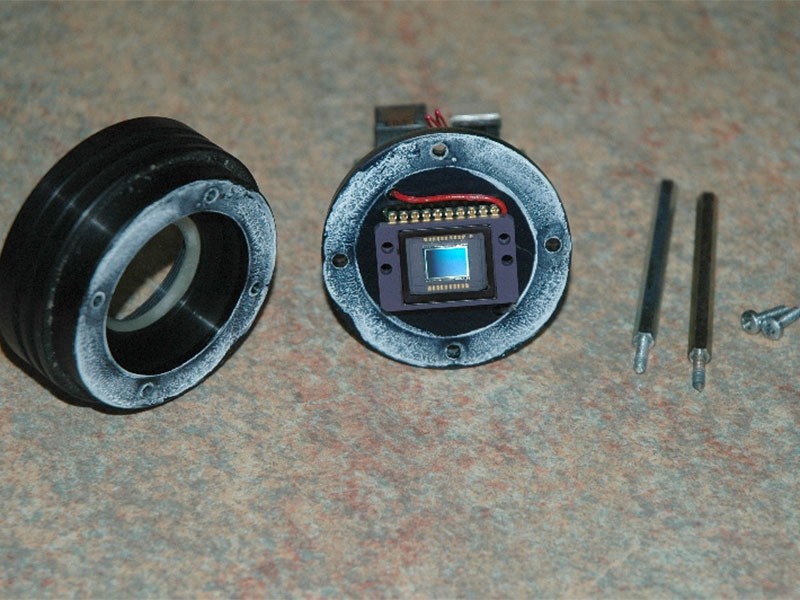
Note the location of pin 1 of the CCD before removing it from the socket. Pin 1 has either an extended gold pad on the CCD body (H9/H9C), a thickened pin top (M5/5C) or a tag projecting from the pin side (M7/7C). The CCD chip is in a socket and may be gently pried up and out of the socket by pushing a wood or plastic wedge under each end in turn. Be careful not to stress the chip body or the ceramic cooling element under the CCD while doing this.
Place the removed CCD pins down on a sheet of aluminium baking foil to protect it from static damage. Now clean the ceramic surface of the cooling device to remove old thermal grease and put a new clean blob of grease onto the middle of its surface. Don’t use much – about the size of a rice grain will be enough. Now align the new CCD pins with the socket, making sure that it is oriented with pin 1 in the correct position. Gently push it home until it is level on the cooler and the thermal grease is squeezing out at the edges of the cooler surface.
The new chip will be supplied with a peelable plastic protecting film on the glass. Once you are sure that it is correctly positioned, peel off the plastic and immediately replace the barrel front over it to stop dust particles falling onto the glass.
Carefully reassemble the camera, renewing the white thermal grease barrel seal, if necessary. It is wise to leave it slightly open in a warm place for an hour to dry out the chamber before sealing it and testing. DON’T test it until it is sealed up, or you will cover the CCD in dew as it cools down!!
It may be tested for dust spots and overall functionality by putting a pinhole lens over the barrel end and imaging the sky.